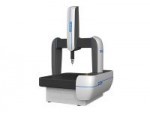
High Precision Represents Comprehensive Power
In the field of mechanical measurement, precision represents comprehensive power. FRDCMM accuracy has reached 1.8μm, which can be comparable to that of international measuring machines. It means FRDCMM has edged into the advanced machine manufacturer ranks in the world.
|
Model |
Range (mm) |
MPEE/MPEP (µm) |
External Size (mm) |
||||||||||
|
X |
Y |
Z |
1.2+L/300 |
1.4+L/300 |
1.6+L/300 |
1.8+L/300 |
2.0+L/300 |
2.2+L/300 |
2.5+L/300 |
LX |
LY |
LZ |
|
|
1.2 |
1.4 |
1.6 |
1.8 |
2.0 |
2.2 |
2.5 |
|||||||
|
FRD565 |
510 |
610 |
510 |
● |
● |
● |
● |
● |
|
|
1066 |
1443 |
2474 |
|
FRD585 |
510 |
810 |
510 |
● |
● |
● |
● |
● |
|
|
1066 |
1643 |
2474 |
|
FRD8106 |
810 |
1010 |
610 |
● |
● |
● |
● |
● |
|
|
1466 |
2049 |
2700 |
|
FRD8156 |
810 |
1510 |
610 |
● |
● |
● |
● |
● |
|
|
1466 |
2549 |
2700 |
|
FRD10128 |
1010 |
1210 |
810 |
|
|
|
● |
● |
● |
● |
1781 |
2342 |
3088 |
|
FRD10158 |
1010 |
1510 |
810 |
|
|
|
● |
● |
● |
● |
1781 |
2642 |
3088 |
|
FRD10208 |
1010 |
2010 |
810 |
|
|
|
● |
● |
● |
● |
1781 |
3142 |
3088 |
|
FRD121510 |
1210 |
1510 |
1010 |
|
|
|
|
|
● |
● |
2070 |
2650 |
3500 |
|
FRD122010 |
1210 |
2010 |
1010 |
|
|
|
|
|
● |
● |
2070 |
3150 |
3500 |
Note: Accuracy of the selected coordinate measuring machine should be 1/10 of the tolerance of measured workpiece.
The machine is equipped with temperature compensation system.
L: Length of the measured workpiece (mm)